Welcome to the first installment of what will likely be a series of tutorials on building algorithmic trading bots to do a multitude of things for us automatically! Along the way, we’ll touch on APIs, cloud computing, stock and option trading strategies, and a little bit of data science to search for opportunities. It should go without saying that none of what is written about here constitutes as financial advice, it’s quite likely you’ll lose money listening to me ;)
Let’s get started.
Setting up an account with TD Ameritrade
For the purpose of this series, I’m going to be using TD Ameritrade as our broker for everything we cover. This is largely a personal preference (it’s who I use for retirement, etc.), but what you choose is up to you- with the notable exception that your broker should have an API that you can get data from and access your account to make trades from. I believe Robinhood has an API as well, but I haven’t explored its capabilities much at all.
To get started, open an account with TDA if you haven’t already. The account type doesn’t really matter, but Individual is probably your best bet if you want to follow along. You don’t have to fund your account right away if you simply want to give this whole thing a shot first. Once you’ve got a brokerage account, you’ll need to register for a developer account. This is a separate account, so you can use the same username for continuity.
Building your first app
In order to place orders on your account, you need to create an developer application that will allow you to do so. Think of this as vehicle in which you can access your account. We need to create a module that will let us programmatically interact with our account via API and this is how we’ll do it.
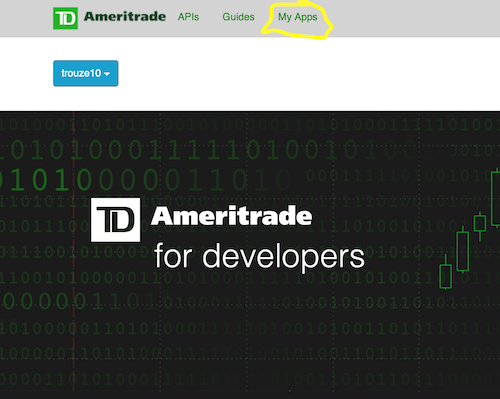
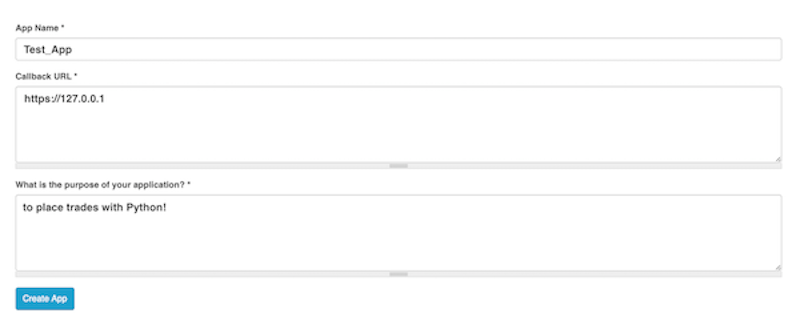
At the top left of the screen after you register, you’ll see “My Apps”, click on this and add an app. From here it’s pretty simple, give the app a name, a description, and then specify a callback URL. The callback URL is how you’ll receive authentication to access your account, for the purpose of this tutorial we can simply use localhost to do this. It’s best to use HTTPS protocol to do this so I’m using https://127.0.0.1.
Once your app gets approved, you can go to My Apps and click on the app to view your Consumer/API Key. This key is important to keep personal (do not share it!), but we will need it to perform OAuth.
tda-api
There is a beautiful package of wrappers built by Alex Golec that will allow us to do much of what we’re going to want to in the near future (documentation here and source code here). As opposed to making a large number of HTTP requests to TD’s API, we can simply use this wrapper to make things a little bit easier and less ugly. This package will make OAuth a breeze as opposed to having to handle a set of auth keys and tokens. We’ll need to install the tda-api package, and we’ll also want to have ijson on hand to parse the JSON responses we’ll get from our requests, as well as selenium to perform the OAuth workflow. To download the necessary packages, I’ll use pip in Z shell:
|
|
Chromedriver
Once we have the packages, we’ll also need to have Chromedriver downloaded. This will allow Python to programmatically open Google Chrome (tda-api is browser agnostic, so Chrome isn’t necessary but you need a driver of some sort). Take care in where you place the executable, we’ll need to put the path in our script.
OAuth
To get the keys to the car so we can access our account and place trades, we need to get a token that will allow us to verify who we are. For 99% of people, using the process that the tda-api package has in place is exactly what we need. If you are wanting to go serverless with your trading, then this process will not be for you as we’ll be generating a token file that will not work in a serverless architecture. To make my life easier, I’m planning to instead use a VM instance. If your head is spinning at the last couple sentences, this process will work for you.
To get this thing cooking, we’ll go ahead and authenticate and then get some price history for $AAPL. To do this, we write up the following in a .py script.
|
|
To break it down, we are doing the following:
- Importing tda and json packages
- Specifying the token path, it’s likely you’ll want to keep it in the same directory that you’re working in, so calling it
'token'will suffice api_keyis the Consumer Key that is listed on your app. Leave the suffix@AMER.OAUTHAPredirect_uriis the callback URL we specified when making our developer app, if you’re following along it should be https://127.0.0.1- What happens next is the script will try to authenticate, because we don’t have a token yet, we will drop down to the
exceptcall, which will bring up a web browser. - We need to tell
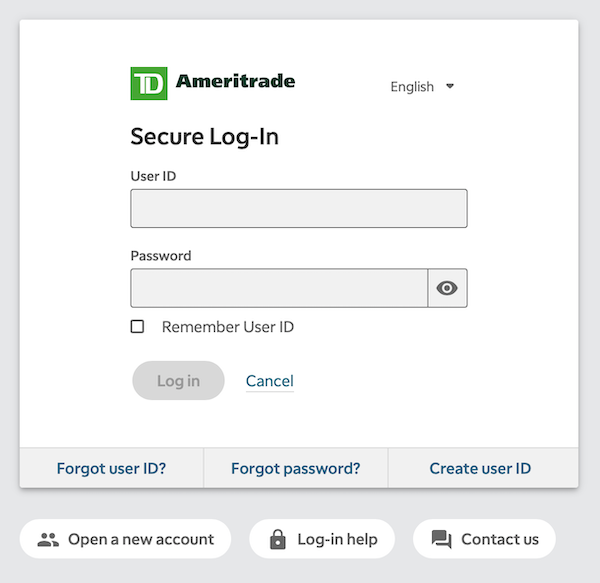
seleniumwhere to find the Chromedriver that we downloaded earlier, so enter the path afterexecutable_path=and make sure you putchromedriverat the end of it so it can execute. - This is where the login flow wrapper will open Chrome and bring us to the TD Ameritrade authentication page, enter your Brokerage account username and password (not developer account!). Under the hood, this makes a request with your Consumer key that sends back an authorization token to our Callback URL, in which we capture through
selenium. The auth token gets written to ourtokenfile.
- This part of the code uses our current authorized session to request price history on $AAPL
Copy the above code block and put it in a Python script and run it.
|
|
This will run the flow, print the price history, and save the auth token in a file token in the same directory.
Auth Token
TDA’s auth tokens last for 90 days, and the tda-api package will automatically update when the 90 days is up through the same workflow. It should also be noted that the auth token is used to generate a session token, which only lasts for 30 minutes. So if you’re running this line by line and too much time passes, you’ll have to re-authenticate:
|
|
And again, I can’t stress enough, do not share any of the tokens/keys or put them online anywhere.
If you’ve made it this far, you now are set up to programmatically access your TD Ameritrade account via API request. Boom!
Check back soon, as I’ll be walking through how we can take this to the cloud where we’ll be able to schedule scripts to be ran during trading hours. To get updated automatically, subscribe and I’ll fire it out to you when it’s ready.